Tonight I wanted to build some track. It’s an activity I always enjoy and I find that over the past few weeks I’ve been reading alot about how others build their own N scale track and it’s been interesting to see how they’ve worked around some areas I find tricky. I’ve also been doing a lot of reading and learning about the European FS160 finescale standards. FS160 works in many ways like the British 2mm finescale standards, but adapted for 1:160 scale trains running on 9mm gauge track instead of the larger British 2mm scale (1:!48 scale).
To learn more about FS160, check out Henk Oversloot’s superb and extremely informative website:
http://fs160.eu/
From Henk’s website, here’s a link to the standards for FS160 modelling:
http://www.fs160.eu/fiNeweb/standards/HANDB.php
2mm Scale Association homepage:
http://www.2mm.org.uk/
So, back to my turnout. I’m still using Micro Engineering brand code 40 rails soldered to PC board ties from Fast Tracks – both are just excellent products.
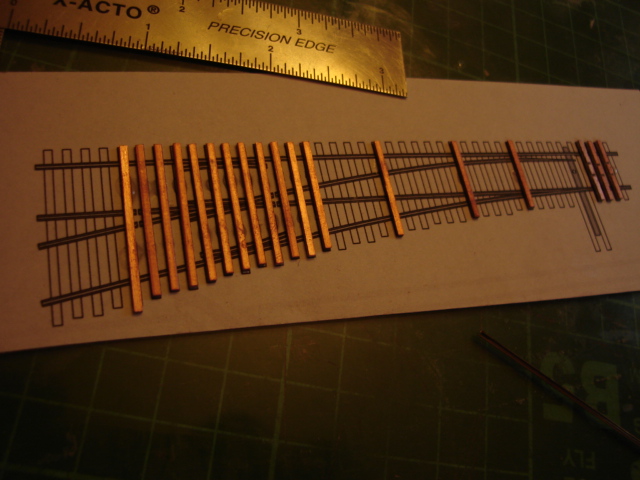
The Fast Tracks people have some excellent templates available on their website and I printed off their #6 turnout template (click here to visit their library). I like taping the template to a piece of glass to build on top of. Some modellers will use some double-sided tape to hold the ties in place but I’ve been using a tiny drop of CA glue under each tie. I find it really holds the ties in place and keeps them from wandering around. Once I’m done, I’ll just cut the template away before installing the turnout on the layout. Both the 2mm and the FS160 modellers recommend using only PC board ties throughout the track where American modellers seem to prefer to use these turnouts only for every fifth or sixth tie with the balance being wood. I agree with the economic arguments toward the American approach but also see that the exclusive PC approach will just make stronger track and since I had the ties already thought I’d start working toward all-PC ties. Here’s a photo of the template with the ties in place:

This time I actually cut each tie before placing it on the template where before I’d just lay in all the full-length ties and cut them at the end. With the turnouts I’ve built in the past I find that the latter approach results in mostly a bunch of rough cuts and this precut approach just looks terrific. Pre-cutting the ties is something I’m definitely going to keep doing.
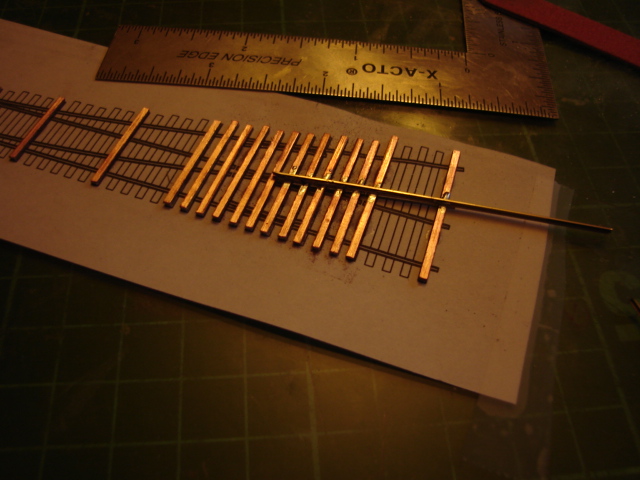
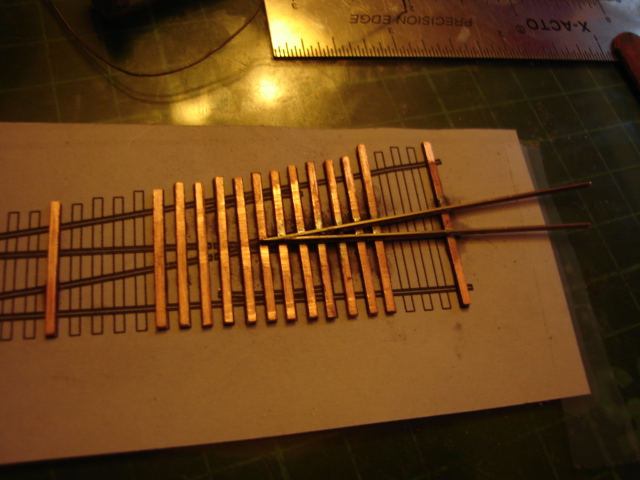
When it comes to fitting in the rails, I’ve always started laying in my rails from the straight stock rail across. Inevitably I wind up trying to force the frog rails into place with the diverging stock rail and it just winds up in a frustrating dance of moving rails around. I’ve been watching Toni Ryan’s really great Youtube videos on track building and he recommends starting at the frog rails. It’s a brilliant idea and I’m probably the last model railroader alive to realise how much better this will be. This way I’ll make up a perfect frog and then just install the rails around it, starting with the point blades and rails.
Here’s are some photos from this stage:

I hadn’t thought of this until I started soldering in these first rails but since there are no other rails around, in the way, I had lots of room to remove excess solder and even cut in the isolating gaps in the ties. I’m already sold on this order of operations and can’t wait to get more done on this turnout. The next rails I’ll solder in are going to be the point blades and rails. I’m planning on not only carefully fitting these rails in around the frog but also seeing how tight I a fit I can acheive on the flangeways to get that finescale look. For now, think I’ll stop for a tea break.

Categories: Trackwork and Handlaid Track

Leave a comment